Monday, November 8, 2021

Whole Wheat English Muffins


 Hello friends! It’s been a day or two… but I feel like I start off every blog post with this greeting now days. Ha! Life has been busy, but also full, and blessed. But I’m so thankful we can meet again! I have a special recipe just for you! I’ve never made English Muffins before- and I’m a huge fan of freshly baked bread- so I figured why not?! 


Here they are. The star of the show. Hot out of the pan, full of craters and pockets just waiting for melted butter and jam to grace it! 

Let’s not delay any longer- and we’ll jump right in!

INGREDIENTS

Here’s what you’ll need:

-1 3/4 cups (14 ounces) milk, warm

-3 tablespoons butter

-1 1/4 teaspoons salt

-2 tablespoons granulated sugar

-1 large egg, lightly beaten

-4 to 4 1/4 cups flour – you can use all purpose, bread flour or whole wheat flour- or any combination of the 3!

-2 teaspoons instant yeast

-1 tsp baking powder

-about 3-4 TBSP cornmeal- cornmeal is ONLY used during the cooking process to coat the pan/ rolls!


HOW TO MAKE HOMEMADE ENGLISH MUFFINS

1.) In a large bowl, combine the warm milk, sugar, and yeast, allowing the yeast to proof for a few minutes, until bubbly.

2.) Add in the remaining ingredients and then mix thoroughly, for about 5 minutes. Do not add more flour, the dough will be very sticky.

3.) Once mixed, scrape the dough from the bowl onto a lightly floured countertop. Fold the dough over a few times, until you make a nice, smooth ball. Place the dough in a greased bowl and allow it to rise in a warm place for about 1 hour.

4.) Punch down the dough and lay it out on a surface sprinkled with cornmeal. Roll out to your desired thickness. The muffins do rise somewhat, so roll them out about 1/4″ thinner than what you would like the final product to be. Cut out circles with a floured 3-inch cutter. Use the leftover dough to re-roll and cut out more muffins. Cover the muffins with a damp cloth and let them rest for about 20 minutes.

5.) Heat a frying pan or griddle to very low heat. Do not grease, but sprinkle with some cornmeal. Cover the pan and cook for 6-7 minutes on each side.

6.) Let cool before storing. I found out that it is easier to store in an airtight zip lock baggie, and freeze- only taking out what we will eat in a couple of days. They stay fresh a lot longer that way! 

Enjoy!!!!! 

Friday, April 19, 2019

Best Playdough Recipe Ever!


Hello!! I have been extremely MIA lately, and that's just not right! Ha! Since I was last on here, a third kiddo has been added to the group! Presley Rae was born January 4th 2019, at 4 PM. I will have to do a birth story post soon from her birth! 

But first... I have a wonderful rainy day activity for your busy kids! This recipe is so simple, and you are sure to have all of the ingredients right in your own kitchen!

SOFT PLAYDOUGH RECIPE


There is a magical secret ingredient to color your dough...wanna know what it is?


Crayola washable markers!!

What kid wouldn't love to squish warm dough in their hands...and color all over it?! Wait. You mean making a mess is ENCOURAGED? 

YES!

My kids were so excited to press the markers into the dough, and see different colors appear! I let them mix whatever colors they wanted to, and it was such a blast! I'm pretty sure they spent 2+ hours doing this, and I was able to get alot of house chores done. Win! 


I used coconut oil in this recipe, and it made my kids hands so soft! It helps to not make the salt-dough smell as strong, too! I would say this recipe is a winner!


Soft Playdough Recipe 

1 1/2 cups flour 
 1/4 cup salt
 1 tbsp cream of tartar
 1 tbsp coconut oil 
 1 tbsp veg oil 
 3/4 cups boiling water

 Add dry ingredients to a mixing bowl and stir together. Add the oils. Add the boiling water. Stir together with a spatula then switch and use your hands. Place the dough onto the table and start kneading. If it’s not too hot let your kiddos jump in and squish the dough around. They LOVE to feel soft warm dough squishing through their fingers as it comes together.  

To make the different colors, use washable markers and go to town! Press them into the dough and then knead the color in! Add more for darker, more vibrant colors, or mix to create a unique color! My kids loved this part!


Tuesday, August 25, 2015

DIY Moby Wrap (For under $10!)

 
We recently welcomed our little Harper bundle into the world! 4 weeks ago, to be exact. I can't even believe how fast time is flying by! :( Makes me ridiculously sad! Soooooo.... that's why I've decided that I really need to jump in on the "baby wearing". HA! More time I get to spend with our little gal? I think YES! But for real. WHY did I never do this with our son?! For all you mommas out there that are already on the baby wearing train- GREAT idea! Really. Whoever thought of this is a genius! I LOVE having my hands free for helping our two year old, making dinner, getting makeup on, fixing my hair, etc. And I've only used this for one day! lol Just think of all the things I can now do so much easier! (And all the projects I can craft! haha)
 
I know that most Mommas out there love a great deal. You would be silly if you didn't. I also love a good deal. That's why when I set out to find a Moby wrap, I also found the price tag that goes along with it. Yikes. I have a SUPER hard time spending that kind of change on something that I could probably make myself, so I set out to find a tutorial to make my own wrap.
 
To say the least, my eyes started watering after the first three posts I came across. Use this fabric. Don't use that kind. Make sure to sew it like this. Add a tag. Yadda, yadda. Ok. I'm a pretty simple gal. If instructions are more than a couple of pages long, I'm sure to not try it. Lets also be real- when you have two kids, who in the world has that much time to read directions?! You just want to get to the project.. and get it whipped out before kid #1 and #2 wake up from naps or get grumpy.
 
So here it is:
 
Go to your local fabric store. (I wouldn't suggest WalMart like I popped into really quick. Their selection of jersey knits stink!)
Pick out a jersey knit fabric.
Buy 2.5 yards.
Cut your fabric down the center long ways, or "hot dog style".
Pick two ends and sew them together (as seen below), creating a super long, obnoxious piece of fabric. lol
Watch like 1 or 2 Youtube videos on how to tie your Moby wrap (Or have an experienced Mommy show you!)
Use every day because life is now so much easier! ;)
 
That's it.
I also have other great news!! The fabric I chose cost around $8!
 
WIN.
 
I also use mine as a nursing cover! ;)

Friday, May 1, 2015

Life's Precious Moments

I sometimes wish that I could capture these moments- right now, right this second- forever. I know that someday I will miss chasing our little guy around and feeling the newest little gal tossing and turning in my tummy. Landon saying, "Mower? Side?" Every time he wants to go outside and just sit on the lawn mower for hours. The mornings where we are all in bed together and Landon wakes up with big, sleepy eyes and says, "Hi, mom!" The countless times I have to turn the car around at the end of the driveway because we forgot one of his trucks. (Even after he already packed 7 or 8 into the car! ha!)
Sometimes, the struggle is real. I don't feel like getting out of bed when Landon is ready to. I don't feel like picking up a trail of a gazillion toys from the living room all the way to our bedroom. I really don't want to trek another load of laundry up and down the stairs to be washed.
But when I think of how blessed I am to have my tiny, growing family, I realize that it is all too soon that these things will be missing from my life. Eventually, Landon and even our unborn little gal will be all grown up and on their own. Someday they won't need me to make the bed or fold their laundry.
As I'm so emotional right now because of my second pregnancy, I do cry about it. A lot. haha I cry because I don't want Landon to grow up. I cry because I love my husband and family so much and I'm so thankful for them. I cry because I burnt something cooking. I cry because I just want to cry. It's pretty pathetic. I'm so thankful that my husband puts up with me! ;)
I just want to offer some quick advice. This is probably one of the shortest posts I've ever posted- but it was just what was on my heart.
Cherish each moment that God gives you with your children, husband and family. Even little tiny ones in the womb can be cherished, and I suggest it! My little man is almost 2, and these past two years has gone by ridiculously fast! Don't forget the way that they hold your finger so tight right after they were born. Don't forget the way that they splash in the tub or make messes all over the house. Because, before too long you will be in the next phase of life and they will be on to the next new things. ;)
Well, what do you know. I am crying again. So I will need to go get a tissue. Darn hormones! haha!

Thursday, April 23, 2015

Easy One Bowl Brownies (Gluten-Free Option Available)

As a mom, I really detest extra clean up. I would MUCH rather watch our son playing with his trains and trucks, or spend more time outside, than cleaning up messes. So.... this is why I've come up with the best brownies.


No really.

Who doesn't love warm, ooey, gooey, chocolate?! And who also doesn't love less mess to deal with in the kitchen! That's part of the reason why they are the best! lol

Well, I'm here to tell you that THIS is it. Sure, I guess you can't beat the simplicity of a boxed mix, but people! Do a good thing, and do what's right! ha! I love baking and cooking from scratch, and your family will thank you for it, too!

Here it goes. Ready? Dump the below ingredients all together in a mixing bowl and mix until incorporated together. Pour into a prepared 9x13 baking dish and sprinkle on your chocolate chips, and bake on 350* for 20-30 minutes or until a toothpick inserted in the center comes out almost clean. (You don't want to over cook... that is what will give your brownies that gooey texture!)


That's it! Honest! How amazing is that?! Pair with some vanilla ice cream or just eat it right out of the pan by itself. But shhhhh! I won't tell if you do that! ;)

And while everything is baking.. you can put your little ones to work with the cleanup- just because it's so easy! ha!


Ingredients:

  • 2 cups sugar
  • 1 and ¾ cups flour 
  • 5 large eggs
  • 1 teaspoon salt
  • 1 cup vegetable oil
  • 1 teaspoon vanilla
  • ½ cup cocoa powder
  • 1+ cup semi sweet chocolate chips

  •  
    Note: I did substitute regular flour with a gluten free baking flour that I had. If you have a favorite gluten free mix that you use, feel free to substitute the flour for that! I used the same amounts.


    Monday, September 1, 2014

    Buckwheat Corn Bread (Gluten Free)


    Ah, corn bread. So good, so simple, but SO full of gluten. (Sad face goes here) Recently my hubby has had some terrible happenings with wheat/gluten, so I am trying my best to go gluten-free with him. Soooooo, naturally all of the "good stuff" gets cut out.

    But not to worry- where there is a will, there is a way, and I came up with a great recipe that is sure to satisfy!

    But first- here is a picture of some ears of corn (since this post is about corn bread) that my Dad gave to me this morning from a friend's garden! yum! And so beautiful, too!


    Ingredients:

    1 cup cornmeal
    1 cup buckwheat flour
    2 tsp baking Powder
    1 tsp baking Soda
    1 tsp salt
    1/4 cup coconut sugar (or regular sugar)
    2 eggs
    1 1/4 cup buttermilk
    1/4 butter, melted

    Mix all dry ingredients together in a medium sized bowl and set aside.


    Next, in a small bowl, whisk together all wet ingredients; mix in well with the dry items.


    Once everything is mixed together, grease a 9x13 pan or a muffin tin and pour in prepared batter. (Because it is buckwheat flour.. don't be scared to discover that your "typical" corn bread coloring isn't there!)  :)


    Bake at 350 degrees for 20 minutes (or for 10-15 minutes for muffins) or until a toothpick inserted comes out clean.


    Cut into squares and enjoy with a little butter and honey or even homemade jam! ENJOY!!

    So simple, but pretty tasty- and GLUTEN FREE! YEEE HEEE!!


    Monday, June 23, 2014

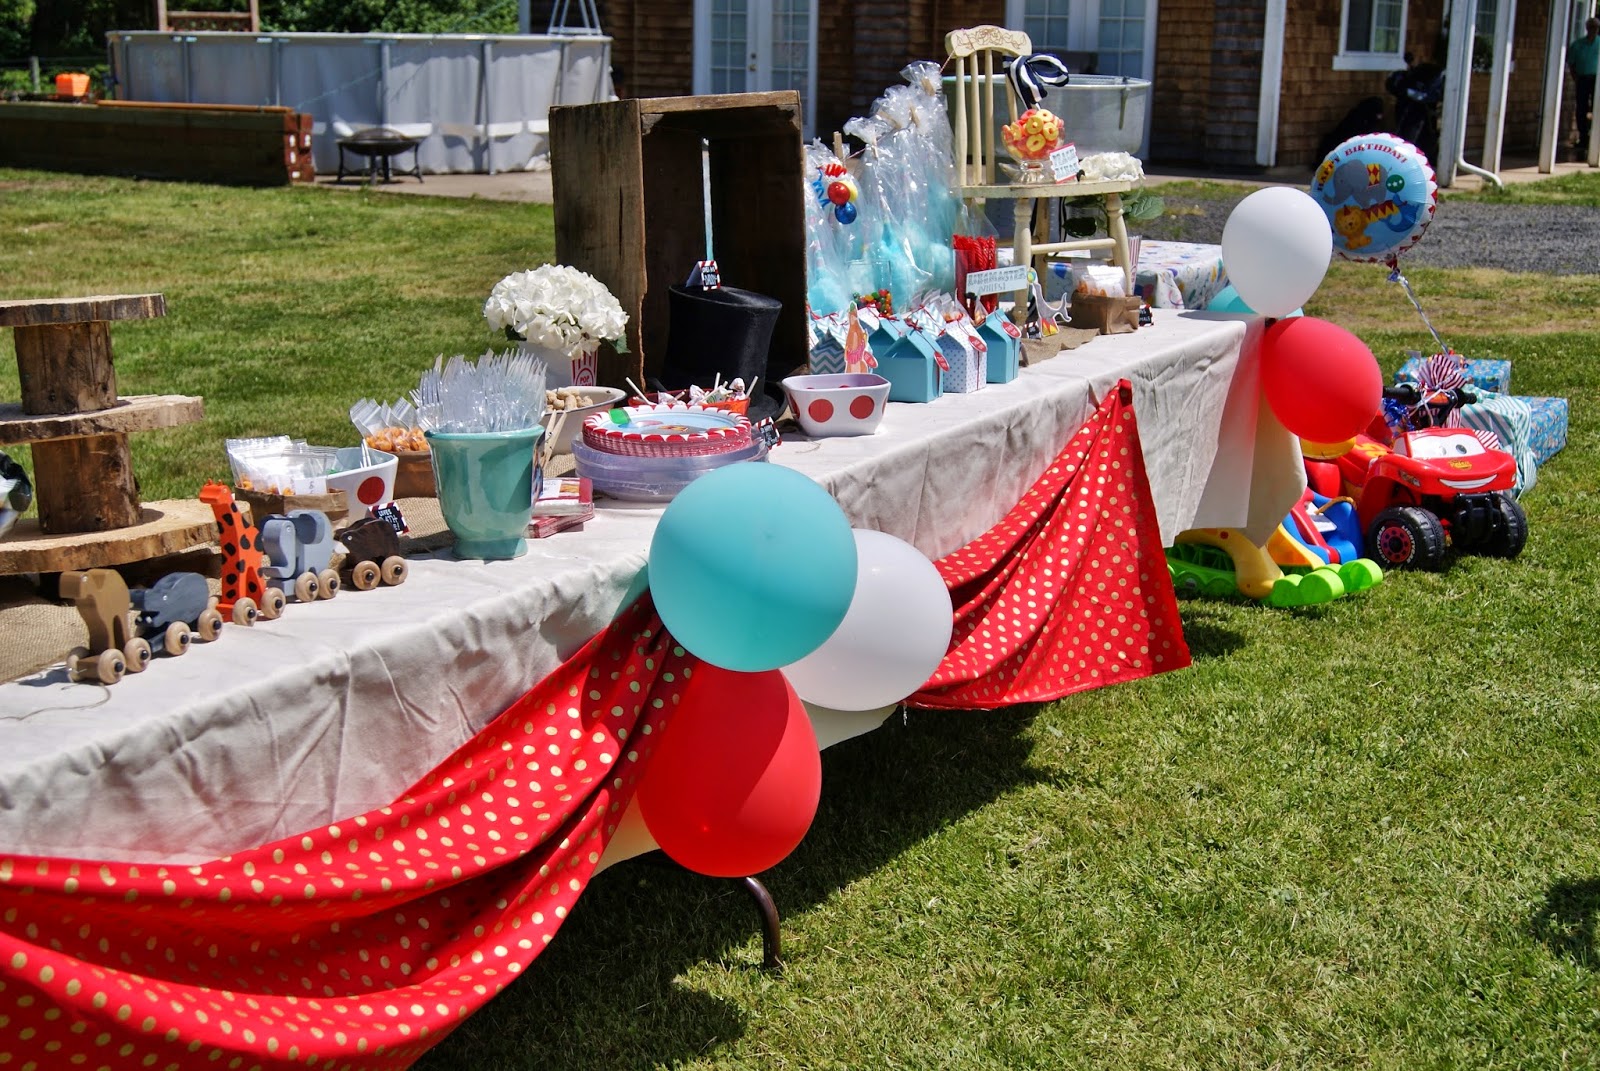
    Landon's First Birthday

    Happy First Birthday to our little man!! I know I am writing this late, but as a new mom (I still consider myself a newbie haha!) my multi-tasking skills need some work still in some areas. What can I say? I would much rather go out and DO, rather than just watch.

    We did a Circus theme for Landon's BIG DAY... it was so much fun!! There was face painting and a petting zoo! I hand drew all of the signs, and made his smash cake and the cupcakes! The awesome circus cake was made by my mother-in-law's friend. She did such an amazing job!!! I hope you enjoy this little sneak peek, we had such a great day.